
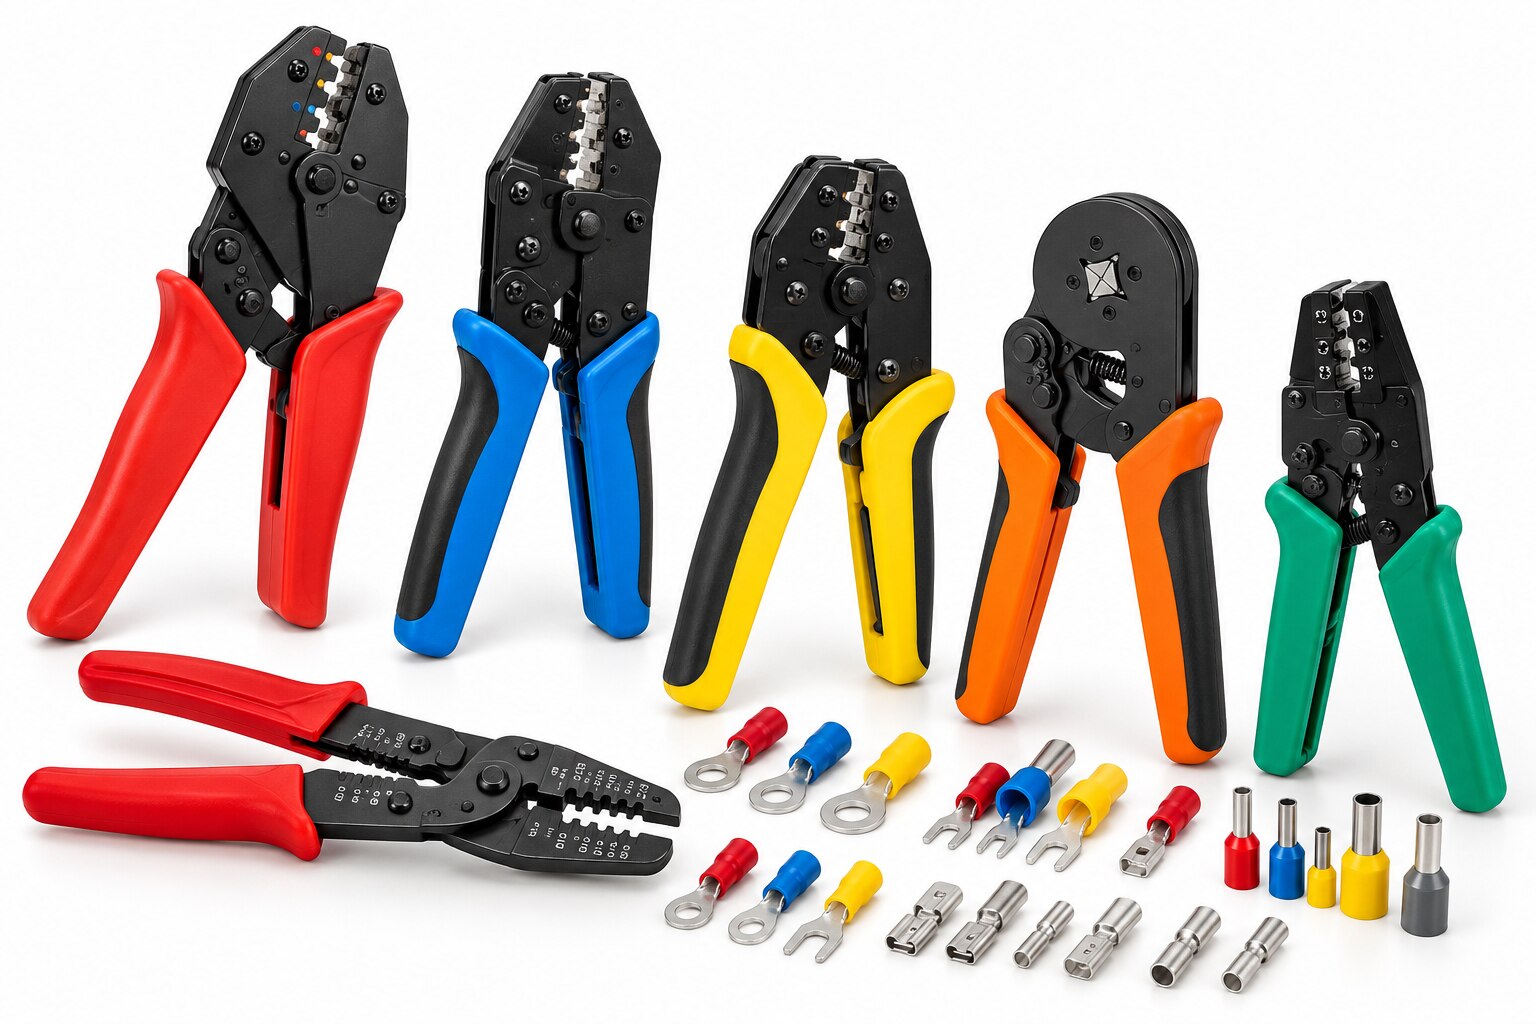
A hand crimper is suitable only when its die, terminal family, conductor material and cross-section are designed to work together. By the end, you will be able to match those parts, complete and inspect a reliable crimp, and decide when hydraulic, battery-powered, pneumatic or hammer equipment is the better choice.
Key takeaways
- Match the die profile and terminal range to the conductor size.
- Strip insulation without nicking copper strands before inserting the conductor.
- Complete every crimp fully and keep the terminal barrel centred in the die.
- Reject connections with loose strands, cracked insulation or an incomplete crimp.
What a manual crimping tool is designed to terminate
A manual crimping tool definition is straightforward: it is a hand-operated tool that compresses a terminal barrel around a conductor using a shaped die.
It does not merely squeeze metal flat; the die creates a specified deformation, such as an indent, hex, oval or B-crimp, that grips the strands and transfers current without loosening under vibration.
| Terminal type | Can a manual tool handle it? | What to confirm |
|---|---|---|
| Insulated red blue yellow terminals | Yes | The cavity must match the terminal colour, barrel size and conductor range |
| Non-insulated lugs | Yes | Use the specified open or closed-barrel die profile |
| Wire ferrules | Yes | Match ferrule length, conductor cross-section and clamp system |
| Open-barrel terminals | Yes | Use the correct wings-and-insulation-support die |
| Coaxial or modular plugs | Sometimes | Use a dedicated die; ordinary terminal cavities are unsuitable |
A visually similar cavity is not an acceptable substitute. A tool that fits the wire can still produce an under-crimp, cracked barrel or excessive deformation when the terminal wall, barrel geometry or strand construction differs. Search results for “wire ferrules crimping tools” do not replace the terminal manufacturer’s specification.
Before use, check for worn jaws, loose pivots and a damaged ratchet. For safety-critical work, verify crimp height or pull-out performance against the terminal specification, not visual appearance alone.
How to match the tool, die and conductor
Confirm four matches before you close the handles: tool marking, die cavity, terminal barrel and conductor size. A tool that accepts the wire mechanically can still produce an unsafe crimp if the terminal family differs.
1. Read the terminal manufacturer conductor range, then compare it with the wire size in mm² and AWG. Use the terminal range as the controlling specification, not the tool’s broader nominal range.
2. Identify the terminal’s required crimp profile. A hexagonal crimp, indent crimp, B-crimp, oval crimp and closed-barrel deformation are different designs; a visually similar cavity is not an acceptable substitute. This check determines indent crimping tool selection.
3. Match the die marking to the terminal barrel marking and conductor range. Check whether the cavity is for insulated terminals, non-insulated lugs, ferrules or open-barrel contacts. For an insulated terminal, use the insulation-support cavity so it grips the jacket without cutting through it.
4. Confirm that the conductor construction is approved. Fine-stranded and extra-flexible wire needs a compatible terminal; nominal cross-section alone does not prevent strands spreading or being cut. Use ferrules only with compatible clamp systems and match both ferrule size and length.
5. Stop if the conductor is aluminum and the tool or terminal is copper-only. Use components marked for aluminum or copper/aluminum, then follow their specified preparation, oxidation control and compound instructions.
Finally, verify that every strand enters the terminal barrel to its stop before crimping. Partial insertion can leave a neat-looking crimp with inadequate electrical contact.
How to complete a reliable hand crimp
A reliable hand crimp starts with the terminal manufacturer’s specified strip length, not a guessed measurement. Remove insulation without nicking strands, and discard any conductor with damaged, splayed or oxidised strands.
- Confirm that the terminal, conductor and die cavity match. Select the cavity for the conductor cross-section and terminal family; a B-crimp and F-crimp profiles are not interchangeable.
- Place the terminal in the cavity with its seam, barrel and insulation support facing the correct way. Close the handles enough to hold it without deforming the barrel.
- Insert the conductor fully into the barrel until the copper reaches the barrel stop. Keep every strand inside; do not fold strands back or push insulation into the conductor section.
- Squeeze through the complete crimping sequence until the handles release. On a ratcheting tool, never force the handles open midway through the cycle.
- Remove the terminal and check that the conductor remains fully inserted, the barrel is centred in the die, and the insulation support grips without cutting into the insulation.
Choose a full-cycle ratcheting tool for repeated work, field maintenance, or any job where an incomplete crimp could be missed. Its mechanism normally prevents handle release before the crimp finishes.
Non-ratcheting pliers suit occasional work only when you can control pressure and inspect every termination; they permit partial crimps that look acceptable at a glance but leave high resistance or weak pull-out strength. Stop if the handles require excessive force: the terminal and conductor combination may need a compound-action, hydraulic or battery tool.
How to inspect and verify the finished connection
A proper crimp inspection confirms that the conductor reached the barrel stop, the terminal is straight, and the barrel has the specified shape without cracks or excessive deformation.
1. Check the conductor end and inspection window. Exposed strands should appear where the terminal design permits; a short conductor, empty window, or insulation inside the electrical barrel indicates partial insertion.
2. Examine the barrel for symmetry. A loose crimp has an under-formed barrel, a terminal that rotates on the conductor, or strands that move when lightly tugged. An over-crushed crimp shows sharp edges, deep die marks, flattened metal, or insulation cut by the terminal.
3. Look for a split barrel, cracked metal, or a tilted terminal. These defects usually indicate the wrong die cavity, poor alignment, or excessive force. The insulation must stop at the specified clearance, while the insulation support must grip its jacket without cutting through it.
4. Do not accept appearance alone for safety-critical assemblies, repeat production, or an unfamiliar terminal family. Measure crimp height against the terminal manufacturer’s specification, and use a pull-out force test when the harness or quality specification requires it. A destructive pull test verifies the sampled process, not every untested connection.
Inspect worn jaws, loose pivots, damaged locating features, and a degraded ratchet because they can change crimp height and produce uneven results. Record the test frequency and minimum force from the terminal or harness specification.
When a manual crimper is the right production choice
Choose a hand tool for low-volume electrical maintenance, field repairs, and confined panels where setup time, access, or portability matters more than cycle speed. It is also suitable for small repeat jobs when the conductor and terminal stay within the tool’s marked range.
Stop choosing it when operators must process large harness batches, record crimp force, or produce identical results across many users.
| Option | Choose it when | Main limitation |
|---|---|---|
| Manual hand tool | Termination volume is low to moderate and access is tight | Operator force and cycle completion vary |
| Hydraulic or battery-powered crimper | Conductors, lugs, or terminal walls demand high force, or production volume is high | Higher cost, charging or maintenance, and setup |
| Pneumatic crimping tool | A fixed workstation has compressed air and needs rapid, repeatable cycling | It is unsuitable for field work without an air supply |
| Hammer crimping tool | Occasional large-cable repairs justify a simple impact method | It needs clearance and gives poorer control than a correctly matched die |
Before buying, verify these points:
- The die profile matches the terminal: hex, indent, B-crimp, oval, or closed-barrel forms are not interchangeable.
- The tool marking covers the conductor cross-section in mm² or AWG and the terminal barrel material and size.
- A full-cycle ratchet prevents premature release; inspect the ratchet, pivots, jaws, and locating features for wear.
- The manufacturer states crimp-height or calibration checks if the work is safety-critical or repeat production.
Ask Dollex Control Panel Accessories for the matching terminal range and replacement-die information rather than selecting by appearance alone.
Frequently asked questions
What does a manual crimping tool terminate?
It compresses a terminal barrel around a conductor, including wire terminals, ferrules, lugs and splices designed for the tool.
How do you match a crimper, die and conductor?
Match the tool and die to the terminal type, conductor material, cross-sectional area and insulation profile shown by the manufacturer.
How do you complete a reliable hand crimp?
Strip to the specified length, insert all strands into the barrel, centre the terminal in the die and close the handles through the complete crimp cycle.
How do you inspect a finished crimp?
Check that the conductor reaches the correct position, no strands escape, insulation is undamaged and the barrel has a complete, even impression.


